
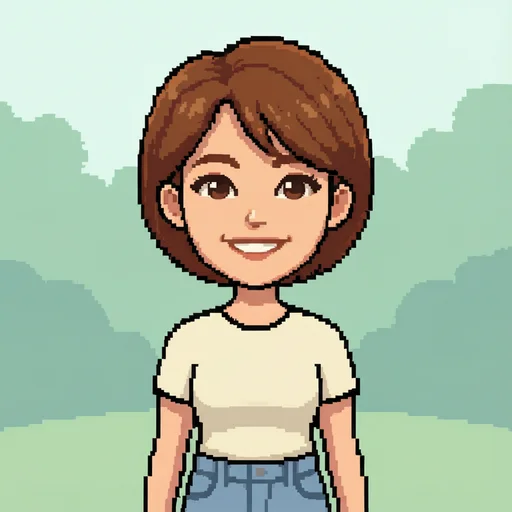
Quick answer: the photo-to-sprite workflow in one pass
A workflow for making pixel art sprites from photos is not “run a filter and ship.” It is a deliberate pipeline: start with a high-contrast, tightly cropped photo of one subject; downsample to your target sprite grid with nearest-neighbor or area sampling at an integer ratio; reduce the palette to roughly 8–16 colors; hand-clean silhouette, outline, and stray pixels in a dedicated pixel editor; export lossless PNG (with alpha) as a single sprite or padded sprite sheet; then set your game engine’s texture filter to Nearest/Point and disable unnecessary mipmaps.
Treat every automated conversion—including browser converters and AI tools—as a block-in, not a finished asset. The cleanup pass is what turns a shrunken photo into something that sits next to hand-drawn sprites without looking muddy.
- Target grids that usually work: 16×16 (props/icons), 32×32 (beginner characters), 64×64 (faces with readable features).
- Palette budget: 8–16 colors for most indie sprites; avoid keeping 50+ colors from the photo.
- Export: PNG + alpha; never JPEG or lossy WebP for gameplay sprites.
- Engine: Filter Mode / Texture Filter = Point / Nearest.
Who this guide is for (and when not to use a photo)
This article is for indie developers, game-jam teams, and hobby pixel artists who already have a photo, product shot, or portrait and want a usable sprite faster than drawing every pixel from a blank canvas. It is also for creators who tried a one-click “photo to pixel” tool and got a beige blob.
Skip photo conversion when you need a brand-new character with no reference, a long animation set from scratch, or a style that must match an existing hand-drawn cast. In those cases, draw in Aseprite/Pixelorama or generate a concept first, then impose a shared palette and grid. Photo conversion shines when proportions and a candidate palette already exist in the source image.
- Use a photo when: one clear subject, strong contrast, you need a fast block-in.
- Draw or AI-generate when: no usable photo, many animation poses, or strict style matching.
- For converter-only exports (avatars, stickers), see How to turn an image into pixel art.
Step 1 — Choose a source photo that survives downsampling
Pixelation exaggerates whatever is already in the image. Flat, evenly lit photos collapse into midtone mush. Cluttered backgrounds waste the few dozen cells you have for the subject. Start with hard light and shadow, one focal subject, and a silhouette you could recognize as a black shape on white.
Crop before you convert. Fill the frame with the character or prop; leave almost no empty margin. For faces, keep the head large enough that eyes still occupy more than one pixel after you hit 32×32. Remove tiny text, jewelry speckles, and busy patterns that cannot survive a 16–32 cell budget.
- Prefer side or three-quarter poses with a readable outline over frontal shots with soft fill light.
- Boost contrast slightly if midtones are crushed together—do this before palette reduction.
- One subject only; group photos and wide scenes almost never become good game sprites.
Step 2 — Lock the sprite grid before you touch color
Decide the native pixel size of the sprite first. That grid is the game asset; everything else is scaffolding. Common indie defaults: 16×16 for props and simple NPCs, 32×32 for characters with clothing and a readable face, 64×64 when you need eyes, mouths, or gear to stay distinct at play scale.
Downsample with nearest-neighbor or box/area sampling at an integer ratio (2×, 3×, 4× from a prepared crop). Avoid fractional scales like 1.5×—they smear edges and produce uneven pixel widths. Judge the result at 100% and at the on-screen size it will actually appear, not only while zoomed in.
- 16×16: icons, coins, simple tools—silhouette first.
- 32×32: default beginner character size for many 2D indies.
- 64×64: detailed heroes or close-up portraits; still keep the palette tight.
- Keep one canvas size per cast so characters do not look like they belong to different games.
Step 3 — Reduce the palette aggressively (8–16 colors)
A conversion that still carries 80–200 photo colors will always read as a tiny photograph, not pixel art. Index or posterize down to about 8–16 colors for sprites, or 16–32 for richer scenes. Prefer hue-shifted shadows (cool the darks, warm the lights) over “add black / add white,” which muddies chroma.
On PiPiPix’s free image-to-pixel-art tool, set block size to match your intended grid feel, pick an automatic or preset palette, and leave dithering off for the first pass. Dither can help soft gradients later; for game sprites, clean flats are usually easier to animate and to match across a sheet.
- Fewer colors for icons and UI; slightly more for portraits.
- If subject and background share the same value, fix contrast or crop—do not add colors.
- Preset palettes (for example PICO-8-style or Endesga-like sets on Lospec) help when the whole game must share one look.
Step 4 — Hand-clean in a pixel editor (non-negotiable)
Open the converted result in Aseprite, Pixelorama, or another pixel-focused editor. Tighten the silhouette so the character reads at a glance. Delete orphan single pixels. Unify outline rules (full outline, selective outline, or no outline—pick one). Rebuild eyes, hands, and weapon edges by hand; auto converters almost always ruin thin features.
This is the step most “workflow for making pixel art sprites from photos” articles under-specify. Converters and AI tools are excellent at blocking proportions and suggesting a palette. They are poor at authorship. Budget 10–30 minutes of cleanup per hero sprite; props often need less.
- Turn off anti-aliasing on brushes—hard edges only.
- Onion-skin later animation frames against this cleaned base.
- Compare against a known good sprite from your game so scale and outline weight stay consistent.
Step 5 — Animation reality check (photos only give one pose)
A single photo is one frame. Idle motion (2–4 frames of breathing or blink) and a walk cycle (typically 6–8 frames for readable indie movement) still require hand-drawn or heavily edited extras. Do not expect a converter to invent a full sheet from one still.
Finish one character’s idle + walk before expanding the cast. A single crisp, correctly imported sprite teaches you palette, outline, and engine settings; ten half-finished conversions teach you frustration.
- Idle: 2–4 frames is enough for most beginners.
- Walk: 6–8 frames is a common readable range.
- Pack frames into one PNG sprite sheet with 1–2 px transparent padding between cells to reduce edge bleed.
Step 6 — File formats that keep sprites crisp
Export gameplay sprites as PNG with an alpha channel. PNG is lossless on hard edges and compresses flat color regions well. Avoid JPEG and lossy WebP for assets that enter the engine—blocky artifacts and soft edge noise destroy the pixel look even at “maximum quality.”
GIF remains useful for sharing animated previews on itch.io or social media. Some engines can import GIF frames in an editor, but PNG sprite sheets are the more reliable runtime default across Unity, Godot, and GameMaker-style pipelines.
- Gameplay: PNG + alpha (sheet or sequence).
- Preview/share: GIF or short MP4 is fine.
- Never: JPEG / lossy WebP for in-game sprites.
Step 7 — Engine import: Nearest filtering or it will look blurry
If a clean sprite turns soft the moment you hit Play, the problem is almost always filtering—not your art. Set the texture/sprite filter to Nearest or Point (no filter). Disable mipmaps for 2D pixel sprites unless you intentionally zoom far out and accept blended LODs. Match pixels-per-unit (or import scale) to the sprite’s native size so you do not get sub-pixel blur from mismatched scale.
Also avoid block-compressed formats that smear flat color regions. Prefer uncompressed / true-color (or your engine’s equivalent lossless path) for small pixel atlases.
- Unity: Filter Mode → Point (no filter); disable mipmaps for 2D sprites when appropriate.
- Godot: Texture Filter → Nearest on the sprite/texture.
- Match PPU / import scale to canvas size (for example 32 PPU for a 32×32 sprite).
A practical converter-first path with PiPiPix
You can run the downsample and palette steps in the browser before opening a desktop editor. Open the free PiPiPix image-to-pixel-art tool, drop a cropped JPG/PNG/WebP, choose block size for the chunkiness you want, limit colors, keep dithering off for sprites, inspect at native size, then export an integer-scaled PNG. Conversion runs locally in your browser for the free tool—no account required to try the workflow.
Take that PNG into Aseprite (or Pixelorama) for silhouette cleanup and animation, then import the final sheet into your engine with Nearest filtering. If you only need a social avatar or sticker and not a game asset, you can stop after the converter export—see How to turn an image into pixel art for block size, dithering, and non-sprite export settings.
- Open the free image to pixel art converter.
- Companion guide: How to turn an image into pixel art.
- Need pasteable text instead of sprites? Use How to convert an image to ASCII art.
Checklist: photo → game-ready sprite
Print or copy this list and tick it once per asset. It is intentionally boring—that is how sprite pipelines stay consistent.
- Source photo: one subject, strong contrast, tight crop.
- Grid locked: 16 / 32 / 64 (or project standard) before coloring.
- Downsample: integer ratio; nearest or area sample—no fractional scale.
- Palette: ≤16 colors for most sprites; dither off on first pass.
- Hand cleanup: silhouette, orphans, outline rule, eyes/hands.
- Animation: only after one still reads clean; idle 2–4, walk 6–8 as a starting range.
- Export: PNG + alpha; sheet padding 1–2 px.
- Engine: Nearest/Point filter; mipmaps off unless required; PPU matches size.
Common failures (and the fix)
Expecting a one-click finished sprite is the top failure. Plan a cleanup pass. Keeping too many colors is the second—reduce until it stops looking like a photo. Scaling by non-integer ratios fragments pixels. Mixing canvas sizes across a cast breaks visual consistency. Forgetting Nearest filtering blurs even perfect art.
If thin features disappear, raise the grid (for example 32→64) or simplify the design so those features are chunkier. If the result looks noisy, turn dithering off and flatten midtones. If the engine still blurs, re-check filter mode and PPU before redrawing the sprite.